Gardening Guide
Nourish Your Garden Naturally: A Guide to Homemade Banana Peel Fertilizer
In the quest for eco-friendly gardening solutions, homemade fertilizers are gaining popularity. Among the array of natural fertilizers, banana peel fertilizer stands out as an accessible and effective option. Rich in essential nutrients like potassium, phosphorus, and calcium, banana peels offer a sustainable and inexpensive way to nourish your garden soil. In this article, we’ll delve into the simple yet powerful method of making homemade banana peel fertilizer for your garden.
Ingredients and Tools: To make banana peel fertilizer, you’ll need the following:
- Banana peels (organic if possible)
- Water
- Blender or food processor
- Airtight container or jar
- Strainer or cheesecloth
- Spray bottle (optional)
Step 1: Gather Banana Peels Start by collecting banana peels. Organic bananas are preferable as they are free from pesticides and chemicals. You can accumulate peels over time by saving them from your kitchen scraps. Ensure the peels are clean and free of any stickers or residue.
Step 2: Prepare Banana Peels Once you have an adequate amount of banana peels, cut them into smaller pieces. This step helps in the decomposition process, making it easier to extract nutrients. Don’t worry about precision; rough chopping will suffice.
Step 3: Blend Peels with Water Place the chopped banana peels into a blender or food processor. Add water in a ratio of 1 part peels to 2 parts water. For example, if you have one cup of banana peels, add two cups of water. Blend the mixture until it reaches a smooth consistency.
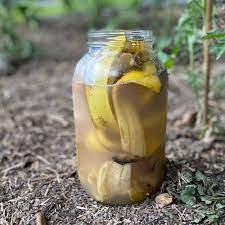
Step 4: Fermentation (Optional) Fermentation can enhance the nutrient content of the fertilizer and expedite the breakdown of organic matter. Transfer the blended mixture into an airtight container or jar. Seal it tightly and let it sit for 3-4 days at room temperature. Stir the mixture occasionally to promote fermentation.
Step 5: Strain the Solution After fermentation (if applicable), strain the mixture using a fine mesh strainer or cheesecloth. This step separates the liquid fertilizer from any solid residues, yielding a concentrated nutrient-rich solution.
Step 6: Dilute and Apply Once strained, dilute the concentrated solution by mixing it with water in a 1:3 or 1:4 ratio (1 part fertilizer to 3 or 4 parts water). This ensures that the fertilizer is not too potent for your plants, reducing the risk of burning. You can use the diluted solution to water your plants directly or pour it into a spray bottle for foliar application.
Step 7: Store the Remaining Solution Any leftover banana peel fertilizer can be stored in the refrigerator for up to a week. Proper storage helps maintain its potency and prevents spoilage. Remember to label the container with the date to track its freshness.
Benefits of Banana Peel Fertilizer:
- Cost-effective: Utilizes kitchen waste to create a valuable garden resource.
- Environmentally friendly: Reduces reliance on chemical fertilizers, promoting sustainable gardening practices.
- Nutrient-rich: Provides plants with essential nutrients like potassium, phosphorus, and calcium for healthy growth.
- Improves soil structure: Enhances soil fertility and texture, promoting better water retention and aeration.
In conclusion, making homemade banana peel fertilizer is a simple yet rewarding endeavor for any gardener. By harnessing the nutrient-rich properties of banana peels, you can nourish your plants naturally while reducing waste. Incorporate this eco-friendly fertilizer into your gardening routine and watch your plants thrive with vitality.

You must be logged in to post a comment Login