Fruits
How to Grow Strawberries from Tiny Seeds – A Step-by-Step Guide
Strawberries are one of the most beloved fruits—sweet, juicy, and packed with vitamin C. While many gardeners opt to grow strawberries from bare-root plants or runners, growing them from seeds can be incredibly rewarding. It might take a bit more patience, but starting from tiny seeds gives you more variety and control over the growing process.
Here’s a simple, step-by-step guide to help you grow strawberries from seed, right from germination to harvest.
Step 1: Choose the Right Strawberry Seeds
Not all strawberries are created equal. When buying seeds, look for varieties suited to your climate. Alpine strawberries (Fragaria vesca) are a popular choice for seed starting—they’re hardy, flavorful, and produce small but delicious fruit.
Pro Tip:
Choose non-GMO, heirloom seeds for best results and a richer flavor profile.
Step 2: Cold Stratify Your Seeds (Optional, but Recommended)
Strawberry seeds benefit from a process called cold stratification—a simulated winter to improve germination rates.
How to do it:
-
Place seeds between damp paper towels.
-
Seal in a zip-top bag.
-
Store in the refrigerator (not freezer) for 2–4 weeks.
This mimics winter conditions and signals to the seeds that it’s time to wake up when they return to warmth.
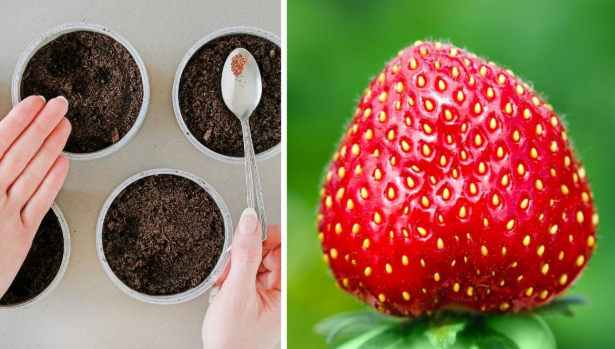
Step 3: Prepare Your Seed Trays
Strawberry seeds are tiny, so start them indoors in trays or small pots where you can better control their environment.
You’ll need:
-
Seed-starting mix (light and well-draining)
-
Shallow trays or small pots
-
Spray bottle for watering
Instructions:
-
Moisten the soil before filling your containers.
-
Scatter seeds lightly over the surface—don’t bury them! Strawberry seeds need light to germinate.
-
Press seeds gently into the soil.
Step 4: Provide Warmth and Light
Strawberry seeds germinate best at 60–75°F (15–24°C).
-
Cover trays with a humidity dome or clear plastic wrap.
-
Place them in a bright area or under grow lights.
-
Avoid direct, harsh sunlight during the early stages.
Germination Time:
Be patient—strawberry seeds can take 1–6 weeks to germinate.
Step 5: Transplant the Seedlings
Once the seedlings have grown two to three sets of true leaves, they’re ready to be transplanted into larger containers or directly into your garden.
Hardening Off:
Before planting outside, gradually expose your seedlings to outdoor conditions over 7–10 days.
Transplanting Tips:
-
Space plants about 12–18 inches apart.
-
Choose a sunny spot with rich, well-draining soil.
-
Water well after transplanting.
Step 6: Care for Your Strawberry Plants
Now that your plants are in the ground, it’s all about proper care.
Watering:
Keep soil consistently moist but not soggy.
Fertilizing:
Feed with a balanced fertilizer every 3–4 weeks during the growing season.
Mulching:
Use straw or pine needles around the plants to retain moisture, suppress weeds, and keep berries clean.
Step 7: Enjoy the Harvest
Most strawberry plants started from seed will begin producing fruit in their second year, though some varieties may give you a light harvest in the first.
When berries turn bright red and are fully ripe, pick them in the morning when they’re cool and sweet.
Final Thoughts
Growing strawberries from tiny seeds might take a bit longer, but the experience is incredibly satisfying. You’ll not only learn more about the plant’s full life cycle, but also enjoy fruits you’ve nurtured from day one. Whether you’re a gardening beginner or a seasoned green thumb, strawberry seeds are a sweet way to dig deeper into your gardening journey.

You must be logged in to post a comment Login